

แทงบอลออนไลน์อันไหนดี แทงบอลชุด แทงบอลผ่านเว็บ

แทงบอลออนไลน์อันไหนดี เว็บพนันบอลออนไลน์ เว็บพนันอันดับ1 ฝาก-ถอนง่ายที่สุด ดีอย่างไร
แทงบอลออนไลน์อันไหนดี เว็บพนันมีเกมหลากหลายให้เล่น การแทงบอลก็มีอีกหนึ่งเอกลักษณ์ ที่มอบความท้าทายให้ และความบันเทิง หลายคนถามว่าแทงบอลคืออะไร แทงอย่างไรให้ได้ต้นทุนคืน วันนี้จะมาบอกเคล็ดลับดีๆ เว็บพนันบอลออนไลน์ วิธีการแทงบอลให้ได้ต้นทุนคืน อันดับแรกต้องดูบอลให้เป็นก่อน การแทงเป็นอย่างไร ใช้ต้นทุนเท่าไหร่ แทงสูตรดีไหม แทงสูตรคืออะไร ที่หลายคนตั้งคำถาม เบื้องต้นต้องรู้หลักการการดูบอล แนวโน้มไปทางไหน แล้วเริ่มการลงทุนได้ เริ่มแทงขั้นต่ํา 10 บาท
เว็บพนันอันดับ1 ได้ต้นทุนคืนเป็นหลักแสนแน่นอน เปิดใจกับเว็บพนันยูฟ่าเบท เริ่มการลงทุนได้ขั้นต่ำ 10 บาทต่อคู่ มีหลายทีมให้เลือกแทงเลือกเล่น อย่างเช่นอาร์เจนติน่า ลิเวอร์พูล เชลซี โปรตุเกส ฝรั่งเศส เชสเตอร์ยูไนเต็ด และที่อื่นๆอีกมากมาย เว็บพนันบอลไม่ผ่านเอเย่นต์ แทงบอลกับเว็บตลงดีอย่างไร แทงบอลกับเว็บตรงให้มากกว่าที่คุณได้ โดยไม่ผ่านคนกลาง หรือเอเย่นใดๆทั้งสิ้น คุณสามารถเข้าเว็บโดยตรงได้เลย เพียงกดที่หน้าลิงนี้ เพื่อทำการสมัคร สมาชิก แทงบอลสด รับชมการถ่ายบอลสดสมัครง่ายๆ
ก็รับโปรโมชั่นได้เลย 50% หรือพาเพื่อนมาร่วมสนุก ก็ได้รับโปรโมชั่นเพิ่มอีก 0.5% แค่สมัครก็สนุกกันได้ ยูฟ่าเบทเป็นอึดอีก 1 เว็บไซต์ ที่มีความน่าเชื่อถือมาก เป็นที่ตอบรับของผู้คนในคาสิโน เว็บแทงบอลเชื่อถือได้ ยูฟ่าเบทสการันตีการแทงบอล ค่าน้ำดีที่สุดในคาสิโนนี้ โดยเล่นผ่านเว็บตรงเว็บแม่
ยูฟ่าเบทตรง จ่ายจริงสามารถถอนได้วันละ2.5ล้าน มันคงเรื่องความปลอดภัย เพราะเป็นเว็บที่จดลิขสิทธิ์แท้ 100% เว็บพนันอันดับ1 เว็บแท้เว็บตรงยูฟ่าเบท สามารถเลือกแทงบอล ทายผลหรือดูบอลสด ถ่ายทอดสดทางออนไลน์ได้ที่นี่ นอกจากการแทงบอลแล้ว ยังมีมวยหรือการแทงมวยให้ได้รับชม และได้สนุกกันอีกด้วย
แทงบอล เว็บพนันบอลไม่ผ่านเอเย่นต์ แทงบอลสด ยืนหนึ่งเรื่องความปลอดภัยดียังไง?

แทงบอลกับเว็บตรงดีอย่างไร อย่างเช่นสามารถฝากถอนได้ ผ่านหน้าเว็บโดยตรง ไม่ต้องผ่านคนกลาง สามารถฝากถอนได้ระบบดูดอัตโนมัติเพียง 30 วินาที รวดเร็วทันใจ ตอบผู้ใช้งานทุกคน สามารถเลือกแทงบอลเดี่ยว บอลชุด เลือกดูผ่านออนไลน์ได้ฟรี
ถ่ายทอดสดให้ดูทุกคู่ เว็บพนันบอลออนไลน์ ตรงนี้มีความทันสมัยมากขึ้น ฉากแสงสี ถือว่าจัดเต็มแบบ 3D Full HD หากเกิดการทุจริตเกิดขึ้น ก็สามารถติดต่อกับเจ้าหน้าที่ได้ 24 ชั่วโมง การตอบรับที่สะดวกและรวดเร็ว เว็บพนันบอลไม่ผ่านเอเย่นต์
ดีอย่างไรที่จ่ายเงินไม่ผ่านคนกลางหรือเอเย่น เว็บนี้จ่ายจริงและถูกลิขสิทธิ์แท้แล้ว ผ่านการจดทะเบียนมาแล้ว มาร่วมสนุกกับเว็บไซต์เราได้ทุกที่ทุกเวลา ที่คงจะเป็นการเดิมพันที่อยากจะนำเสนอ ทุกๆท่านนั้นได้ร่วมสนุก ไปพร้อมกันสมัครบาคาร่าง่ายแค่ 3 ขั้นตอน
แอด Line ยูฟ่าเบท
สร้าง User ตั้งรหัส ID และ password
ฝากเงินระบบอัตโนมัติ
เพียงแค่ 3 ขั้นตอนนี้ ก็เท่ากับว่าคุณเป็นสมาชิก แทงบอล
แทงบอลสด คุณนั้นอยากร่วมสนุก ก็มาร่วมสนุกกับเราได้ทันที ที่มีมาตรฐานทุกท่าน ได้ร่วมสนุกอย่างที่ไม่ว่าคุณนั้น จะเป็นใครก็มาร่วมสนุก กับเว็บไซต์ของเราได้ นี่คือเว็บไซต์ที่มีมาตรฐาน ที่สุดของที่สุดโปรโมชั่น การแทงบอลที่ดีที่สุดยังสามารถได้เงินง่ายๆ สำหรับเว็บไซต์ที่แทงบอลสด ได้อย่างง่ายดาย ด้วยความที่มีมาตรฐาน ของเว็บไซต์ เว็บแทงบอลเชื่อถือได้ เว็บตรงครบครัน เว็บแม่ได้เงินจริงได้เงินไว
มีให้เล่นหลากหลาย เช่นยิงปลา ไพ่ไฮโล ทายผลบอล แทงมวย ถ่ายทอดสดออนไลน์ ไม่ว่าจะเป็นมวยหรือฟุตบอล ก็มีให้เล่นเยอะ ใครชอบบาคาร่าก็มีถ่ายทอดสดให้ได้รับชมสนุกๆ เว็บพนันบอลไม่ผ่านเอเย่นต์ เล่นตรงไม่ผ่านเอเย่นต์ไม่เสียค่าธรรมเนียมใดๆทั้งสิ้น เล่นพนันออนไลน์ผ่านเว็บแม่ เว็บตรงเว็บแม่ รับรองความปลอดภัยของลูกค้า ข้อมูลสำคัญจะถูกปิดเป็นความลับ ความปลอดภัยของเว็บไซต์นี้ ป้องกันการดูดข้อมูลจากที่อื่น
แทงบอลโลก บอลโลกปี 2022 มาแรง กระแสบอลโลกนี้ต้องไม่พลาดการลงทุนเด็ดขาด ที่นี่ยูฟ่าเบสมีแทงบอลลีก แทงบอลออนไลน์ และกีฬาE Sportทุกชนิด ยิงรอบเข้าชิงห้ามพลาดเด็ดขาด ที่นี่หยุดว่าเบสมีการถ่ายทอดสดให้ได้รับชม และร่วมการทายผล แทงบอลออนไลน์ได้เงินจริง เว็บพนันบอลดีที่สุด
ยูฟ่าเบท เว็บแทงบอลเชื่อถือได้ แทงบอลโลก ที่คนเล่นเยอะที่สุด เยอะอย่างไร

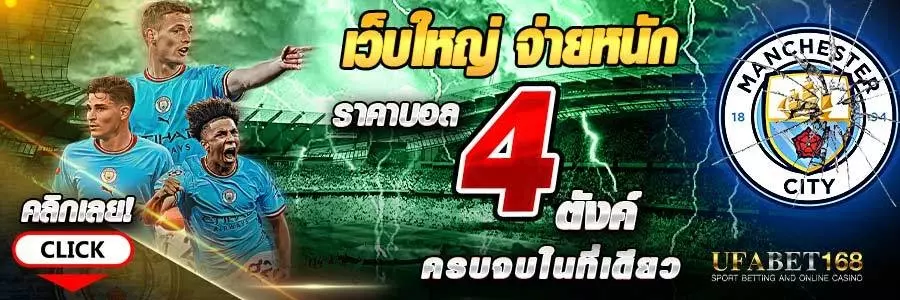
เว็บพนันบอลออนไลน์ marketingtumblerเว็บพนันบอลได้ราคาต่อรองที่ดีที่สุดในประเทศไทยต้องที่นี่ เว็บแม่ยูฟ่าเบท เว็บตรงไม่ผ่านคนกลาง มีค่าน้ำ 4 ตังค์ ค่าคอม 0.5 -1% มีรูปแบบพนันออนไลน์มากกว่าเว็บอื่น แทงบอลเดี่ยวแทงสเต็ป เริ่มพนันออนไลน์อยู่ที่ 2 ถึง 12 คู่ ราคาน้ำดีที่สุดในประเทศ เว็บพนันบอล เว็บที่ดีที่สุดยูฟ่าเบทมีให้เลือกเล่น พนันตั้งแต่ 2 คู่ขึ้นไป 12 คู่ นอกจากการแทงบอลแล้ว ยังมีเกมหลากหลาย เช่นเกมสล็อตยอดฮิต สล็อตแตกง่าย ได้เงินไว มาพร้อมกับบาคาร่าสดให้ร่วมสนุก เว็บแทงบอลเชื่อถือได้
ยูฟ่าเบทนี้มีความน่าเชื่อถืออย่างไร ตอบได้เลยว่ามีความเชื่อถือมาก เพราะเป็นเว็บที่จดทะเบียนลิขสิทธิ์แท้ 100% แล้ว ปลอดภัยหายห่วง ป้องกันการรั่วไหลข้อมูลลูกค้าได้อย่างดี แทงบอลโลก ห้ามพลาดการแทงบอลโลก ยิ่งเข้ารอบชิงยิ่งมีลุ้นที่นี่มีบาคาร่า เว็บแทงบอล สล็อต เกมยิงปลา มวย หรือไฮโลไทย
เกมไพ่ก็มีหลากหลายให้เลือกเล่น เว็บแทงบอลUFABET marketingtumblerแทงบอลออนไลน์อันไหนดี เป็นอีกหนึ่งเว็บที่น่าเล่นแนะนำเลย มีให้เล่นครบครัน แทงบอลค่าน้ำดีที่สุดก็ต้องที่นี่ยูฟ่าเบท หวย มวย หรือจะเป็นไฮโล ให้ลูกเต๋าสร้างกำไร สร้างรายได้ใช้ต้นทุนเพียง 1 บาท บาทก็ สามารถแทงได้เล่นได้ แทงบอลออนไลน์ได้เงินจริง เว็บพนันบอลดีที่สุด
เว็บแทงบอลUFABET มีถ่ายทอดสดบนมือถือแล้วสะดวกแค่ไหนไปชม
เว็บพนันบอลออนไลน์ marketingtumblerตรงนี้มีความทันสมัยมากขึ้น ฉากแสงสี ถือว่าจัดเต็มแบบ 3D Full HD หากเกิดการทุจริตเกิดขึ้น ก็สามารถติดต่อกับเจ้าหน้าที่ได้ 24 ชั่วโมง การตอบรับที่สะดวกและรวดเร็ว เว็บแทงบอลUFABET เว็บที่ดีที่สุดเล่นตรงไม่ผ่านเอเย่นต์ไม่เสียค่าธรรมเนียมใดๆทั้งสิ้น เล่นพนันออนไลน์ผ่านเว็บแม่ เว็บตรงเว็บแม่ รับรองความปลอดภัยของลูกค้า ข้อมูลสำคัญจะถูกปิดเป็นความลับ ความปลอดภัยของเว็บไซต์นี้ ป้องกันการดูดข้อมูลจากที่อื่น เว็บแทงบอลที่คนเล่นเยอะที่สุด
ยูฟ่าเบทสการันตีการแทงบอล ค่าน้ำดีที่สุดในคาสิโนนี้ โดยเล่นผ่านเว็บตรงเว็บแม่ ยูฟ่าเบทตรง จ่ายจริงสามารถถอนได้วันละ2.5ล้าน มันคงเรื่องความปลอดภัย เพราะเป็นเว็บที่จดลิขสิทธิ์แท้ 100% เป็นเว็บที่คนหันมาเล่นเยอะที่สุดในตอนนี้ แทงบอลสด marketingtumblerแทงบอลออนไลน์อันไหนดี ยูฟ่าเบทเว็บพนัน ที่มีให้เลือกเล่น ไม่ว่าจะแทงบอลเดี่ยว แทงบอลสเต็ป มิกซ์พาร์เลย์ สเต็ปคอมโบ เลือกแทงได้ 2 ถึง 12 คู่ ต่อวัน รับประกันค่าน้ำดีที่สุด ดีอย่างไรเช่น สามารถเลือกแทงขั้นต่ำได้ คู่ละ 10 บาท ขึ้นไป และคืนค่าคอมให้ 0.7% เมื่อ
เมื่อเป็นสมาชิกกับยูฟ่าเบท เว็บพนันอันดับ1 เว็บนี้ดีที่สุด มีธนาคารการเงินรองรับ หลายแห่งเช่น กสิกรไทย กรุงไทย ออมสิน ไทยพาณิชย์ กรุงเทพฯ และสถาบันการเงินอื่นๆอีกมากมาย เว็บแม่เว็บตรงยูฟ่าเบทนี้ จดทะเบียนแล้วลิขสิทธิ์แท้ 100% แทงบอลออนไลน์ได้เงินจริง เว็บพนันบอลดีที่สุด
กระแสบอลโลกดีที่สุด เว็บแทงบอลที่คนเล่นเยอะที่สุด ในปี 2022
เว็บแทงบอลที่คนเล่นเยอะที่สุด marketingtumbler เป็นอีกหนึ่งเว็บที่น่าเล่นแนะนำเลย มีให้เล่นครบครัน แทงบอลค่าน้ำดีที่สุดก็ต้องที่นี่ยูฟ่าเบท หวย มวย หรือจะเป็นไฮโล สายไฮโลคอลูกเต๋าห้ามพลาด ให้ลูกเต๋าสร้างกำไร สร้างรายได้ใช้ต้นทุนเพียง 1 บาทก็สามารถแทงได้เล่นได้ เว็บแทงบอลUFABET เว็บแท้เว็บตรงยูฟ่าเบท สามารถเลือกแทงบอล ทายผลหรือดูบอลสด ถ่ายทอดสดทางออนไลน์ได้ที่นี่ นอกจากการแทงบอลแล้ว ยังมีมวยหรือการแทงมวยให้ได้รับชม และได้สนุกกันอีกด้วย เว็บพนันบอลออนไลน์
เว็บนี้เว็บหลักให้อะไรคุณอีกหลายอย่าง บาคาร่าสด มวยสด หรือจะเป็นบอลโลกออนไลน์ ก็มีให้รับชมหลากหลายหรือร่วมสนุกกันได้ เว็บนี้ให้ประโยชน์อะไรกับคุณ ต้องบอกว่าได้หลายอย่าง ได้ทั้งทุนทั้งกำไร ความสนุกความบันเทิง และได้รับโปรโมชั่นดีๆจากทางยูฟ่าเบท เว็บพนันอันดับ1 เว็บที่ดีที่สุดเล่นตรงไม่ผ่านเอเย่นต์ไม่เสียค่าธรรมเนียมใดๆทั้งสิ้น เล่นพนันออนไลน์ผ่านเว็บแม่ เว็บตรงเว็บแม่ รับรองความปลอดภัยของลูกค้า ข้อมูลสำคัญจะถูกปิดเป็นความลับ ความปลอดภัยของเว็บไซต์นี้
ป้องกันการดูดข้อมูลจากที่อื่น เว็บแทงบอลที่คนเล่นเยอะที่สุด marketingtumblerแทงบอลออนไลน์อันไหนดี ยูฟ่าเบทสการันตีการแทงบอล ค่าน้ำดีที่สุดในคาสิโนนี้ โดยเล่นผ่านเว็บตรงเว็บแม่ ยูฟ่าเบทตรง จ่ายจริงสามารถถอนได้วันละ2.5ล้าน มันคงเรื่องความปลอดภัย เพราะเป็นเว็บที่จดลิขสิทธิ์แท้ 100% เป็นเว็บที่คนหันมาเล่นเยอะที่สุดในตอนนี้ มันคงและปลอดภัย แทงบอลออนไลน์ได้เงินจริง เว็บพนันบอลดีที่สุด
